Aerial Yoga: Sun Salutation sequence
Elevate and energise your day with the Aerial Sun Salutation! By Camille Shakti Semiotaite
A Sun Salutation is a sequence of organically linked asanas that are synchronised with the breath to create an intelligent and graceful flow of movement.
Sun Salutations are often used as a warm-up for a more challenging yoga class, but they can be practiced by themselves as a short practice. Usually, the repetition of the cycles is between 6-12 rounds.
In aerial yoga, you will notice that Sun Salutations will differ from the classic version on the mat as we use our aerial yoga silk/hammock sometimes as a help, or sometimes to add more challenge, or even just for a different experience of the pose.
When you practice Aerial Sun Salutations, the first two cycles (one cycle - one side) move slowly, stopping on each position to adjust and focus on the alignment of the pose, so that you get familiar with the sequence. Then continue with more dynamic cycles where movement is connected together with the breath.
Benefits
When we practice Sun Salutations, we stretch and awaken the whole body, improving our strength and flexibility. Breathing with focused intention also has the potential to reset the mind and body for the rest of the day, helping us to feel uplifted and rejuvenated. Let’s go together through this CamiyogAIR adapted version of Classical Sun Salutation with the foot in the silk!
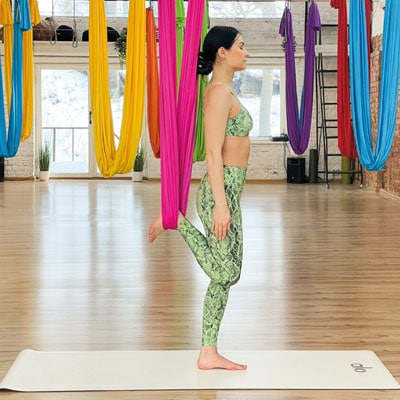
1. Start by standing in front of the silk with the foot hooked inside the silk behind the back. Make sure you are just under the plumb line or in the centre of the silk. While standing in this pose, elongate the spine, feel the grounding through your bottom leg and foot while keeping your standing knee soft as the whole weight is on one knee. To keep kneecap safe and not over extended, slightly bend the knee. Here you can set your intention for the practice.
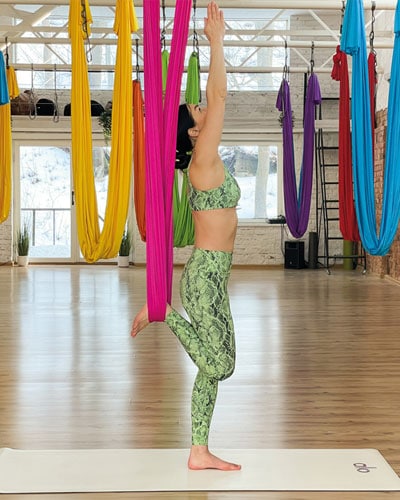
2. Inhale and reach your arms up over your head past the ears and look up. Make sure your shoulders are down and your belly is squeezed in. Feel the space around your neck and ribcage.
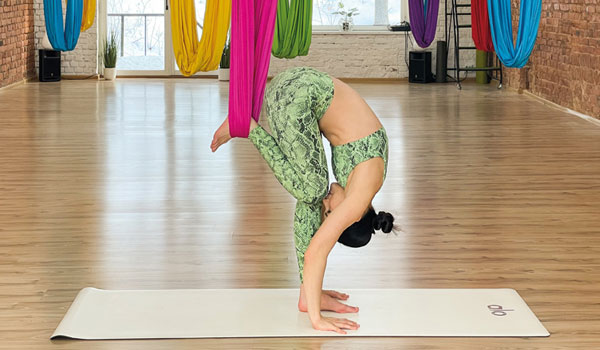
3. Exhale and bend forward with the nose toward the knee. In this forward fold try to keep both knees together as much as possible. If you can’t reach the ground with your hands, you can place them on the shin or on yoga blocks or bend the knee and then try to reach the ground while drawing your belly towards your thighs. Forward folds relax the whole nervous system moving our inner energy through stagnated areas.
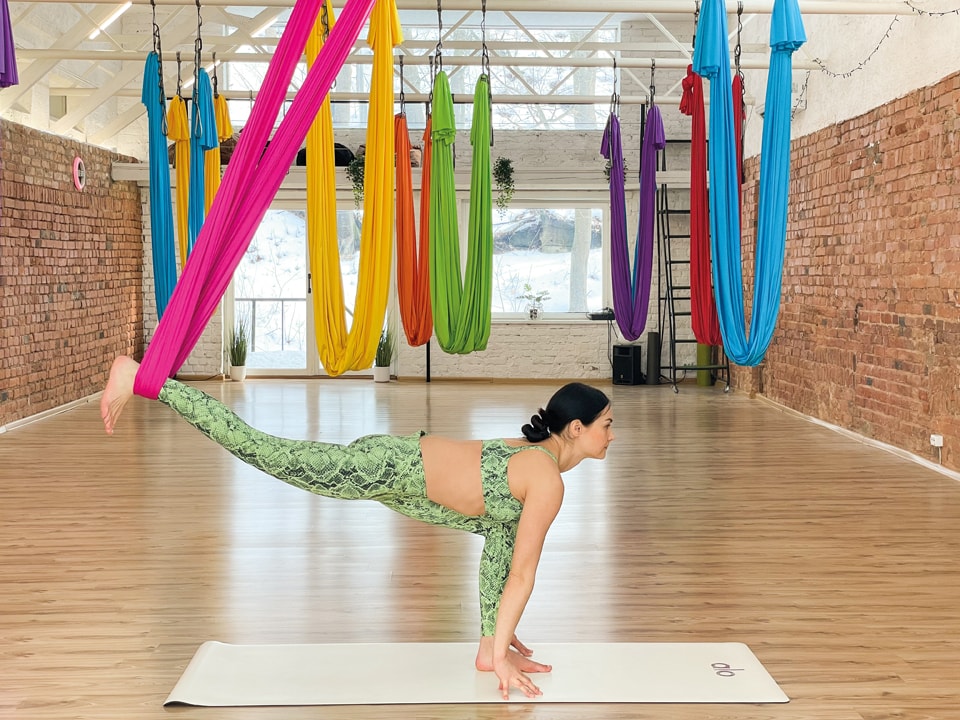
4. Inhale and extend the leg of the foot in the silk backwards, reaching back through the heel and entering a deep lunge. While you do this, make sure you shift your weight backwards and keep the front knee at a 90-degree angle; the knee should be directly over the heel, palms under the shoulders in one line with foot on the ground. If that’s not accessible, put palms on yoga blocks. Lift up your chest and gaze forward. Feel elongation through the spine and the openness through the front of the body.
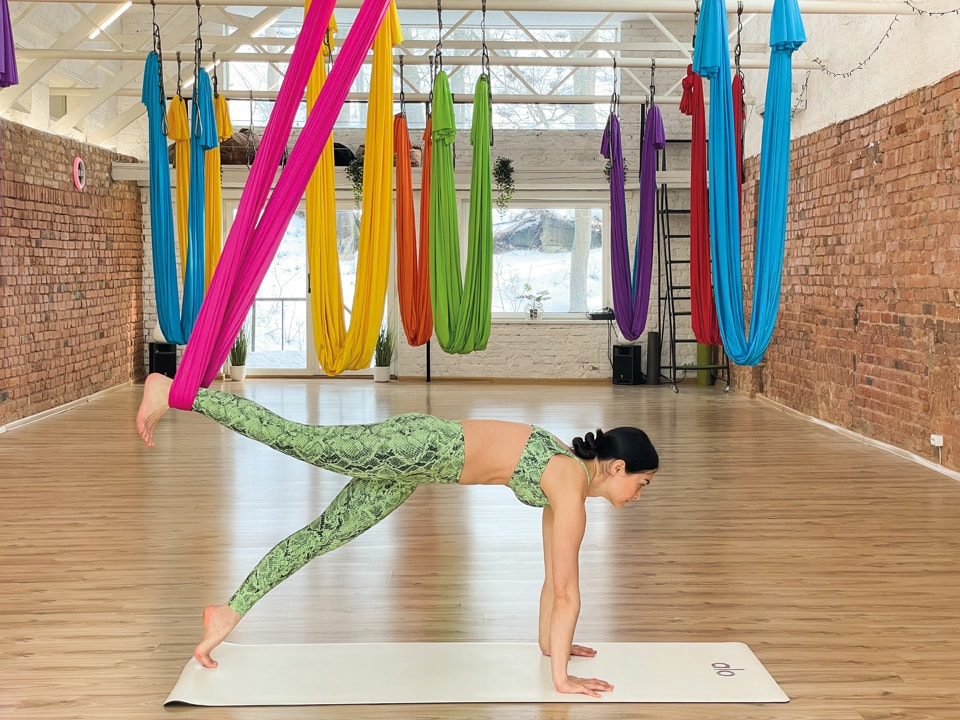
5. Exhale and step or jump back with the front leg into a plank. Inhale and hold your body in a straight line with core, gluteus and legs engaged, belly squeezed in with the shoulders stacked over the wrists. Keep pressing the floor through the wide, open palms and pushing the floor away from you to broaden the shoulder blades in protraction. Gaze is between your palms. Plank strengthens the whole body, energises and improves posture.
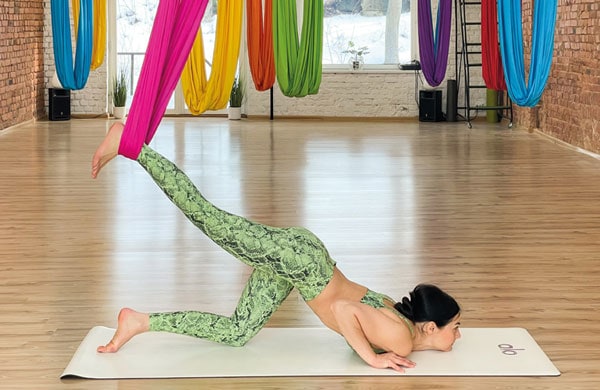
6. Exhale and shift your weight forward, lower down the knee of the leg that was on the ground, bending your elbows to the sides; your chin is leading you forward while pressing down into a yogic push-up. When pressing down, your palms should still be under the shoulders, hips off the ground. If you fail to do so and your elbows end up on the ground, check if your grounded knee is stacked under the hip, or perhaps don’t go all the way down to the ground. Listen to your body. Less is always more.
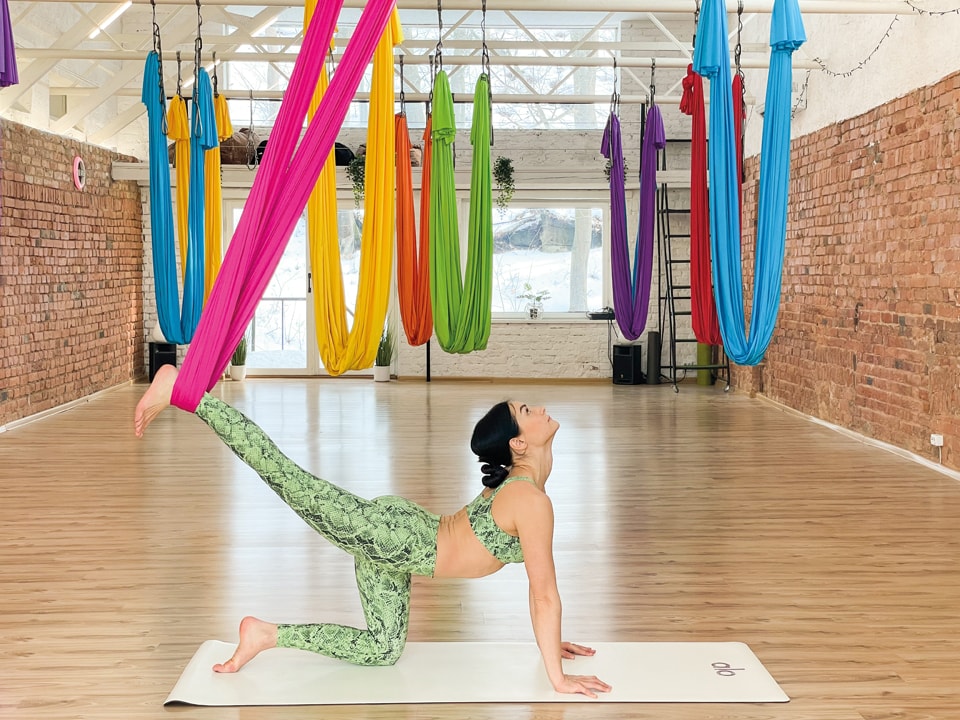
7. Inhale, push through your palms and lift your shoulders up into tiger pose while arching your back, opening the chest and lengthening the neck. Gaze up. Feel like a tiger stretching after a good night’s sleep.
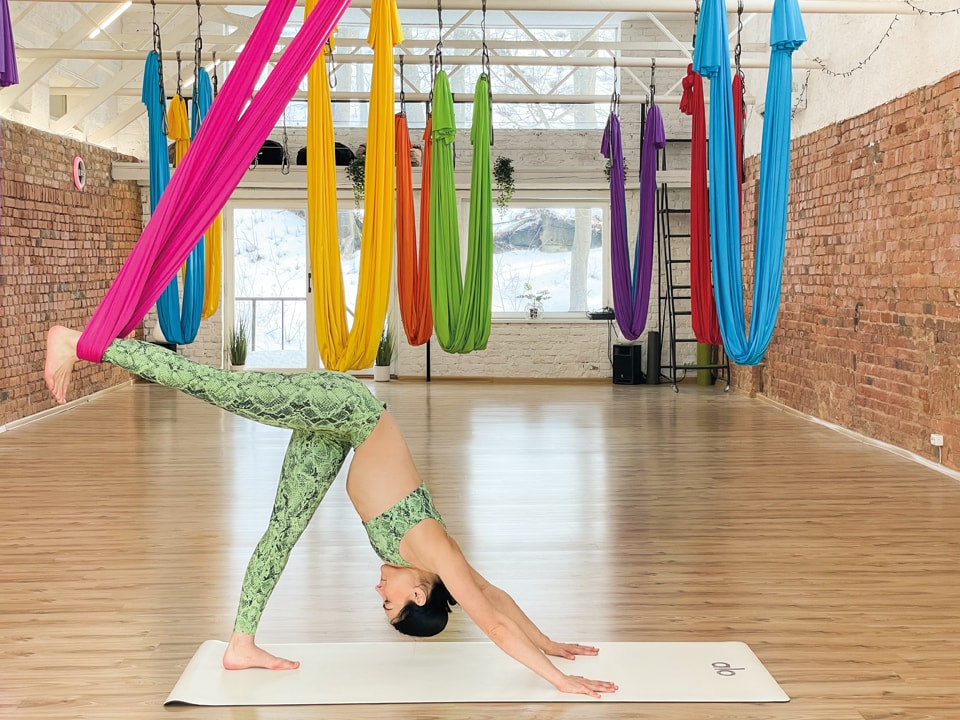
8. Exhale, put your grounded foot on tip toes, press your hands away from the ground and lift your hips up into a three-legged dog pose. Reach up with your tailbone toward the ceiling, while the chest is drawn towards the thigh. The leg in the silk is extended through the heel back, while the bottom leg is extended as much just to keep the back straight and elongated. If you feel like hunching, perhaps slightly bend the knee of the grounded leg. If possible, try to press the heel down to the mat. Shoulders away from the ears, relax your neck and head. Palms keep on pressing away from the mat and fingers are spread wide.
9. Three-legged dog is a mid-point, from which we go back and reverse poses 4, 3, 2, 1 and finish one round of the Aerial Sun Salutation. Now change legs and continue on the other side.
Camille Shakti Semiotaite is the founder of the CamiyogAIR method and an aerial yoga teacher based in Lithuania (camiyogair.com). Follow her yoga journey on Instagram @camiyogair


