Seated forward bends 101
Kino MacGregor breaks down the Seated Forward Bend, the perfect pose to ease a distracted mind or loosen those hamstrings
Forward bending is one of the most basic and foundational elements of the practice. In this article, I’d like to take the time to break that down with you, step by step, so you’ll know how to safely enter the pose and understand what its benefits are on a deeper level. Breaking it down: Pronunciation Paschimattansana can be broken down into the words:
- Paschima: west or back, referring to the back side of the body
- Uttana: is intense stretch and,
- Asana: is the name of the pose that we do.
Sometimes you’ll hear this pronounced in Sanskrit as Paschimottanasana: these are both relatively acceptable, some differ in traditions, such as in the Ashtanga tradition, which is what I’m trained in, where we say Pachimattanasana, and for other styles, the other pronunciation. Now let’s look at the key elements of forward bending
Heels & Sitting Bones
Come to a seated position and stretch your legs out and we’ll highlight some key parts of the body. Bend your knee, reach down and find your heel. This is where the base of your forward bend is going to start from; it creates a sort of book-end down at the bottom. Then, from your heel, tracing your calf muscle to the back of your knee through your hamstring muscle and then move from side to side and finally, find your sitting bones (ischial tuberosities). In a basic forward bend, your sitting bones are going to move away from your heels.
Come back to your comfortable seated position on your sitting bones, knees bent, heels touching the floor, and then push your heels, sliding them out and towards the end of your mat until they are fully extended. This will bring you to the seated Staff pose, which is known as Dandasana. A simple seated position with the legs stretched out and the heels and sitting bones should feel as though they are moving slightly away from each other.
The Pelvis
The second part of the forward bend is creating emptiness in the centre of the pelvis. Begin by taking your hands and placing them on the lower stomach and suck or draw the lower stomach in and up. What you want to think about is emptying out the pelvic bowl. Emptying out the pelvic bowl doesn’t have anything to do with the size or shape of your body — you are perfect just the way that you are! What it’s referring to is softening the tissues of the abdomen so we create flexibility within the inner space of the pelvis.
As you empty out the pelvic bowl you’ll be able to pivot from your hip joints locating the base or the apex of the forward bend at the centre of the pelvis. That allows you to then pivot from your hip joints rather than rounding your back to move forward.
Elongating The Torso
The third component of the forward bend is elongating your back muscles, instead of contracting back muscles or squeezing the front line or core; we’re thinking about elongating the whole torso, to come into the forward bend.
To review the three components of the forward bend:
- Sitting bones move away from the heels
- Emptiness in the pelvic bowl
- Relaxation and elongation through the muscles of your back
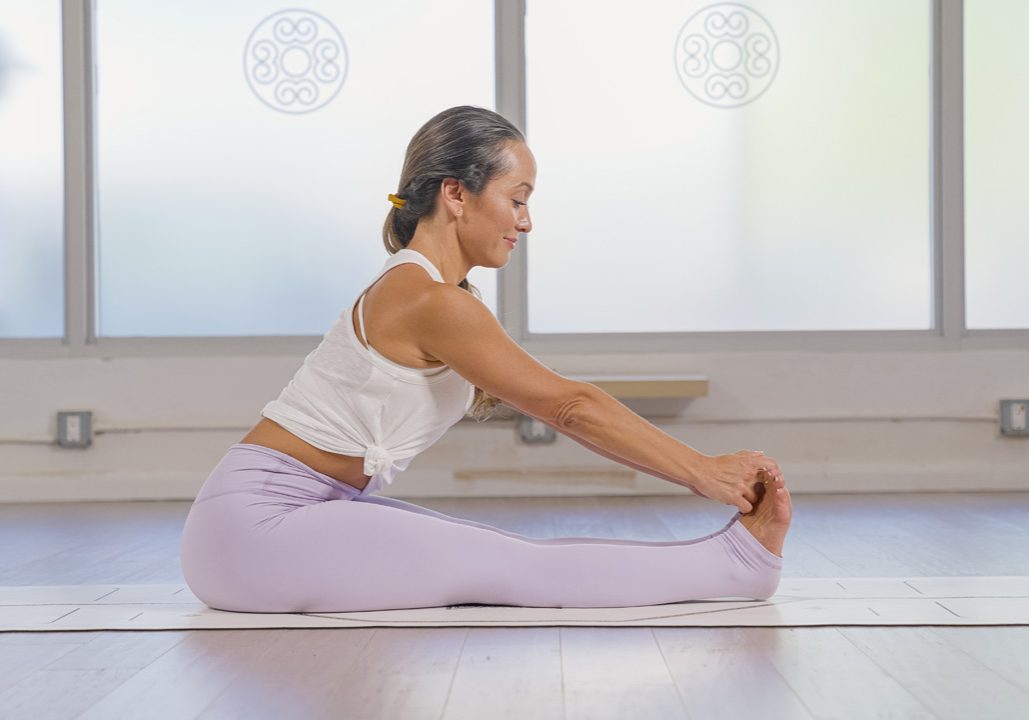
Now let’s see if we can put those three pieces together.
From Dandasana, or Staff pose, with the legs stretched out, heels pressing down slightly, spread your toes apart and engage the feet as though you are standing on your feet and root the heels down. Then, walk your mind and attention up your shin bones, hold on to your knees for a moment and lift the knee caps. When we focus on the engagement of the frontside of the leg it allows for the backside of the leg, the hamstrings, to release slightly. These muscles, the hamstrings and the quadriceps, are antagonistic muscle groups; very simply, this means that when one of these muscles engages the other releases slightly so it can elongate.
Now we have the foundation of the legs, from your heels, through the shin bones, knee caps, quadriceps, and the sitting bones gently spreading and pressing into the floor beneath you. Avoid hyper-extending the knees by keeping a slight micro-bend.
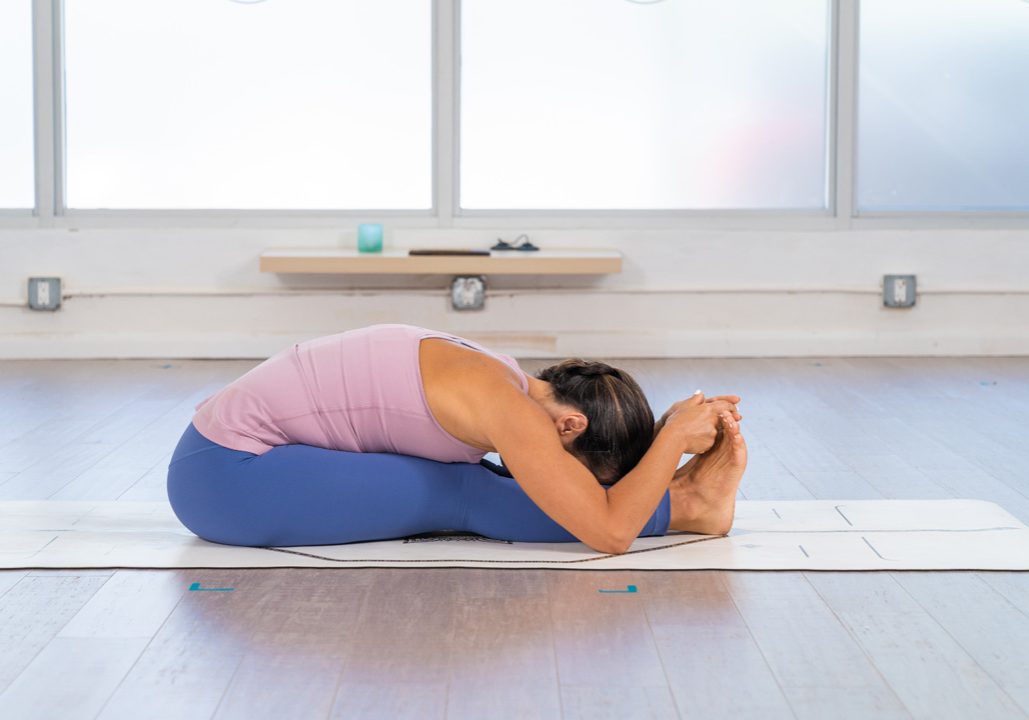
Next, hold on to the lower stomach. Take a moment and close your eyes. Take a deep breath in and as you do, draw the stomach deeply inwards and you feel the sensation of emptying the whole space within the pelvis. Continue to keep your hands on the lower stomach to help connect you with the sensations of the inner body as we fold and explore the movement of this posture. Drop your attention into the space behind the pubic bone and draw inwards again on your next inhale and slowly start to pivot a little bit forward. As you do this, connect with the sensation and image of the pelvic tipping or spilling forwards. From here, take a moment and find your sacrum, the triangular bone that sits at the back of the pelvis, and as you come into your forward fold, you’ll feel as though your sacrum lifts up and over as you continue to fold. Bring your attention to the elongation of the torso. As this posture deepens, the lower ribcage will come into contact with the thighs; if you’re here, take a few moments in this position, release your hands and hold on to your big toes. Then inhale, straighten the arms, and stay here. The next thing we’ll focus on is how to safely work into the rest of our forward bend.
The most common mistake in this pose is if someone either has their hands holding their toes or a strap around their feet is — as soon as they have something to hold on to they try and pull themselves forward with force. We don’t want to do any movements with too much force of the arms. Instead, gently hold the toes or your yoga strap, relax the arms and the shoulders, lift the chest, elongate the back, inhale, draw in through the lower stomach and pelvic bowl and exhale as you pivot from the hip joints while you fold as far as is comfortable for you. Ultimately, our yoga practice is tailored towards our individual anatomy and you’ll need to play and explore how to do the pose, Paschimattanasana, that feels best for you.
As you fold, you may notice there is some stretching along the back and you may find that start to release. As you stay here, keep your sitting bones moving back and your heels moving away toward the front of your mat.
Variations
Variation A & B
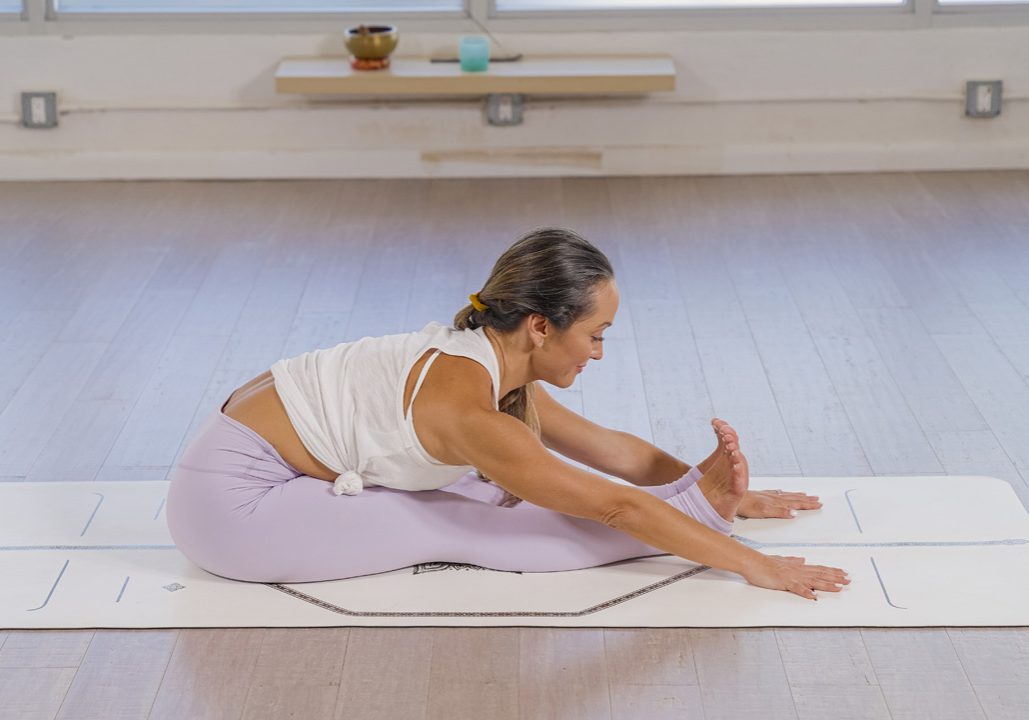
Follow all the steps above to set your foundation. As you begin to fold, instead of reaching for the feet, keep the hands to the outside of the knees, either flat or on your fingertips and stay here. Focus on pivoting from the hip joints, and elongation of the spine.
If variation A feels good, you can continue to pivot from the hips, emptying the pelvic bowl and either hold on to the shins or place the hands to the outside of the feet flat on the floor or on your fingertips.
Counter Poses
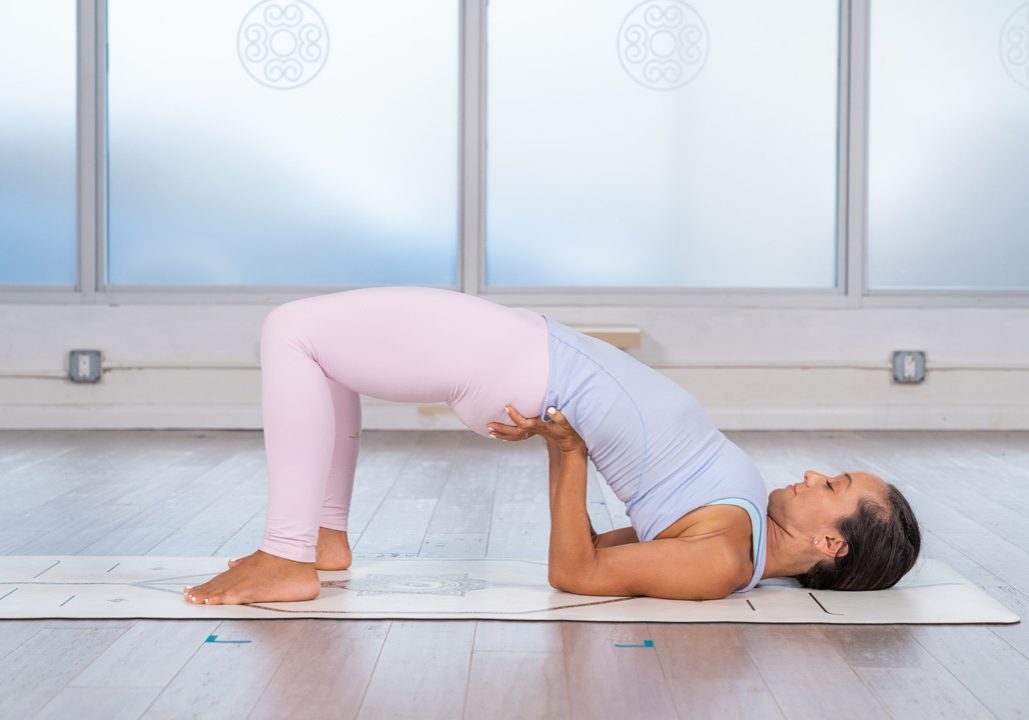
Gentle Bridge
Pachimottanasana is one of the most foundational forward bends in the practice. It can also be really frustrating if your back muscles won’t release, if you feel you don’t have space in the pelvis, or if the hamstrings are very tight. This might leave you feeling blocked not just in this pose but in so many other poses in the practice. My advice to you is to practice patience and tolerance combined with good healthy technique. Never rush the journey, don’t try to fight yourself or fight the pose, every posture has its own time. Stick with the technique with the full faith that if you continue to practice one day it will definitely start to happen. I believe that every pose has a lesson, so I’ll leave you with the thought, “What is the lesson of Paschimattanasana for me?” As you move into this intense forward fold, what will you learn as you journey down into the inner body?


